Author: Nikita Gandhi

  • Horizon – Khalidiya Palace Rayhaan by Rotana Review

    A couple weeks back I visited Horizon at Khalidiya Palace in collaboration with Groupon Middle East to experience their dinner buffet and what a lovely evening it was! The place was quaint and cozy and the staff was so extremely hospitable and service on point. We were welcomed and greeted with beautiful smiling faces, were seated down and were offered a selection of soft drinks to start with.

    IMG_7742

    IMG_7740

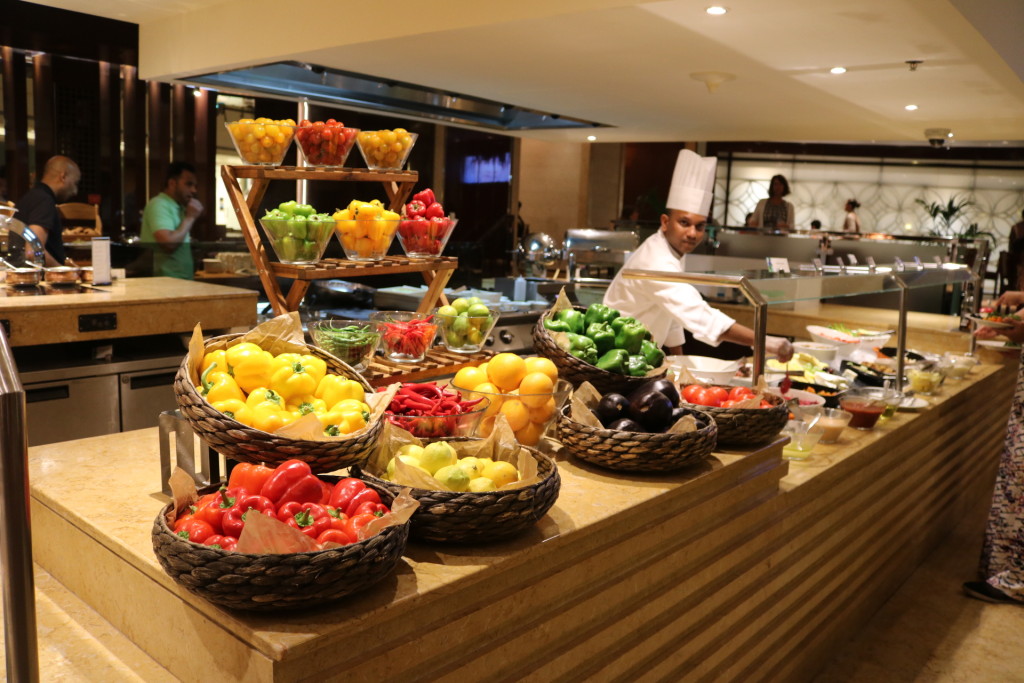
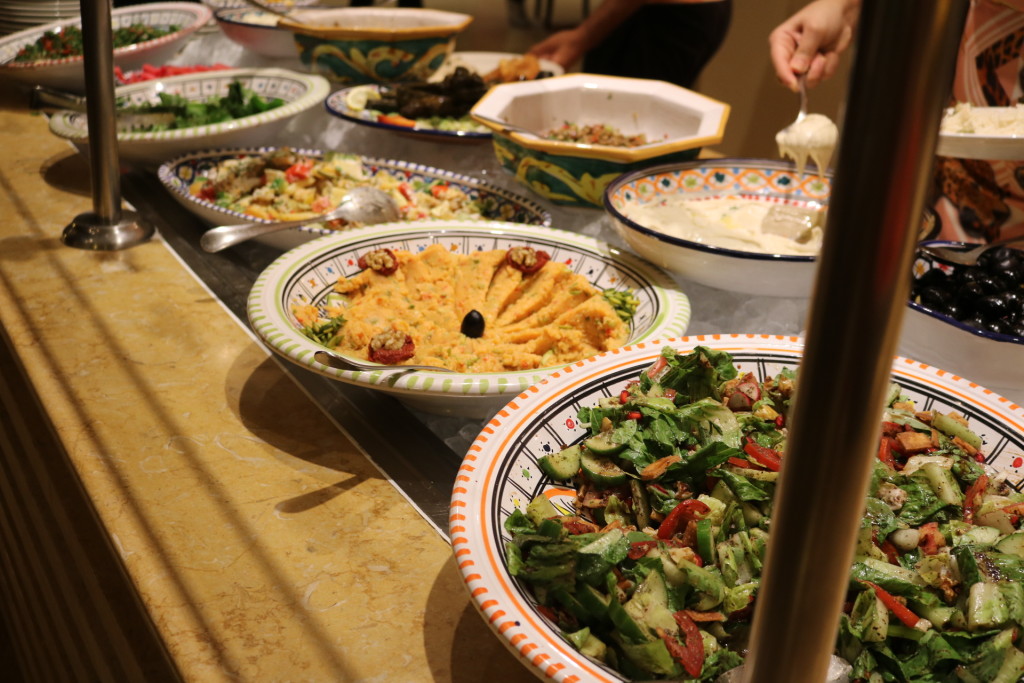
    My friend and I being vegetarians were excited to hit the salad bar for starters. The salad spread was pretty neat ranging from the usual hummus, baba ganoush, tabbouleh and fattoush to some interesting ones like baby okra in tomato sauce, beetroot in yogurt and sumac dressing (this one was our favorite!) and spiced mash potatoes.

    IMG_7738

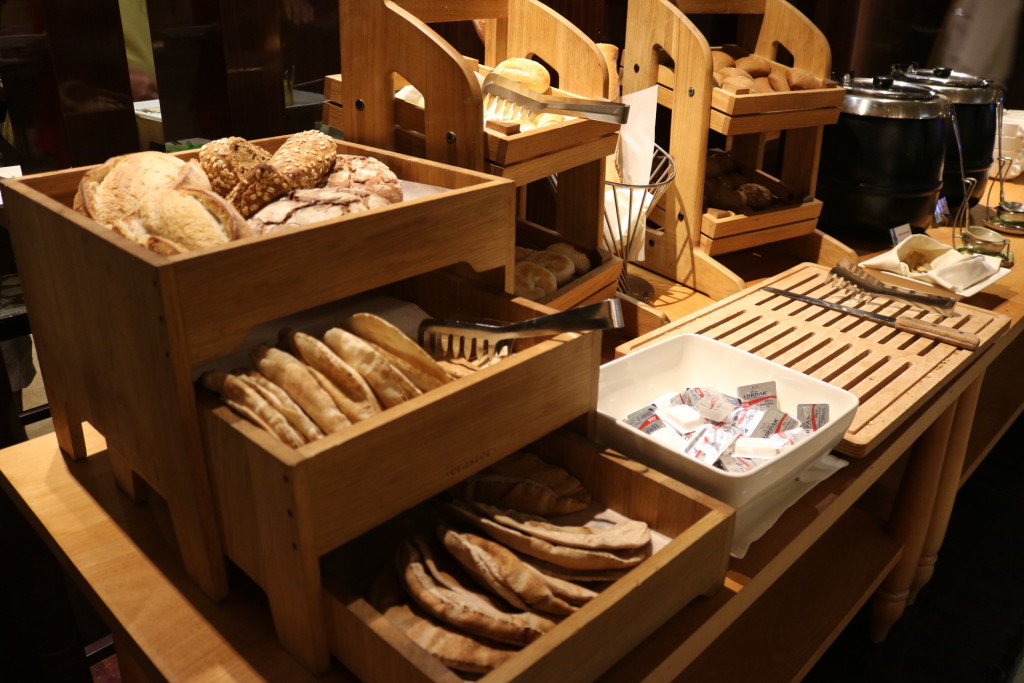
    We being bread lovers tried out all the breads at the buffet and they were all quite delicious and fresh! The Arabic bread however was slightly dried out but the super friendly staff offered to warm it up for us so we could enjoy it with our cold mezze.

    IMG_7743

    Next was the main course — great spread overall, but sort of limited for vegetarians. Again, their exceptional service made up for this one by making us a special Asian stir-fried vegetable dish which was absolutely delicious!

    IMG_7733

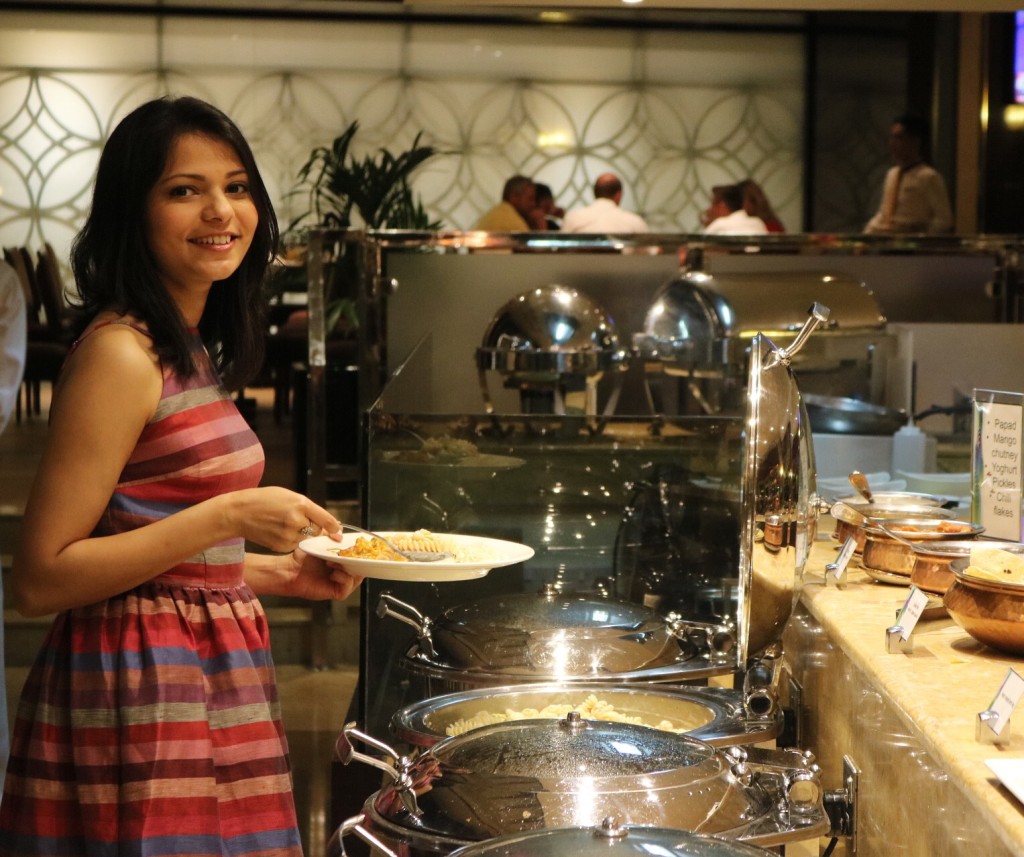
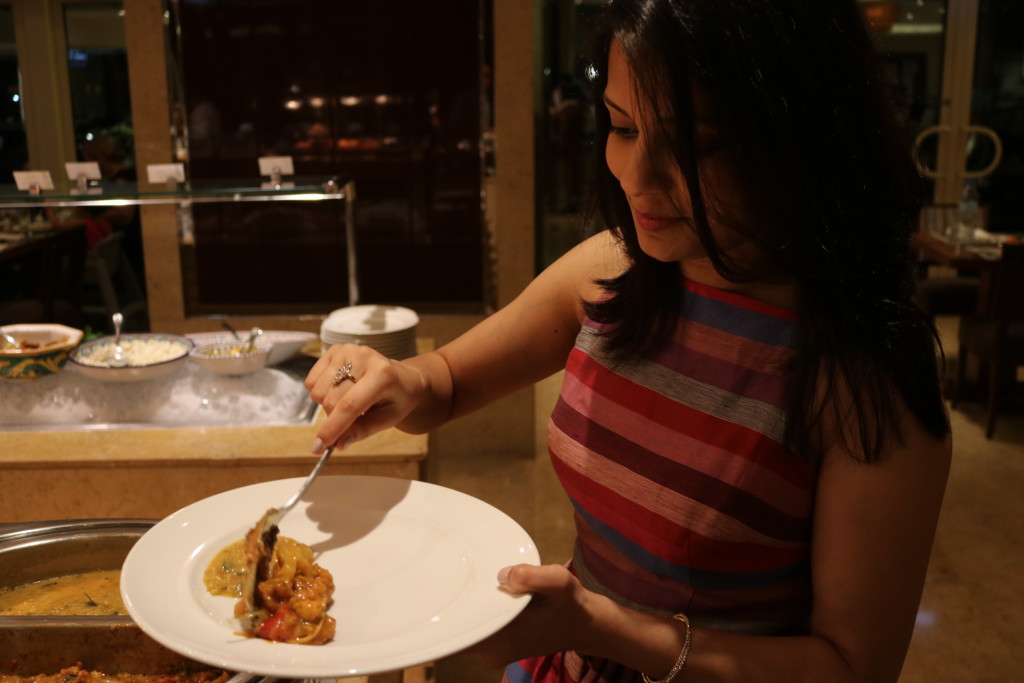
    From the buffet, we had gobi masala (spiced cauliflower), dal tadka, vegetable rice, pasta in white creamy sauce and roast potatoes. All the Indian dishes were very flavorful and not too oily at all (how they generally are at restaurants). The pasta and roast potatoes however was a bit too bland but we had it with a little helping of salt & pepper.

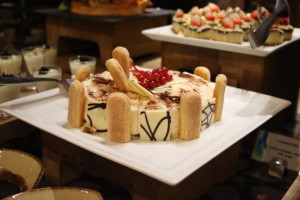
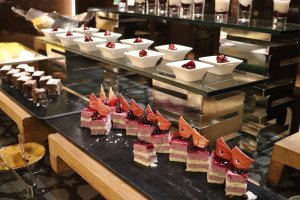
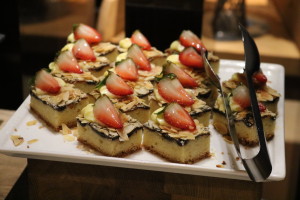
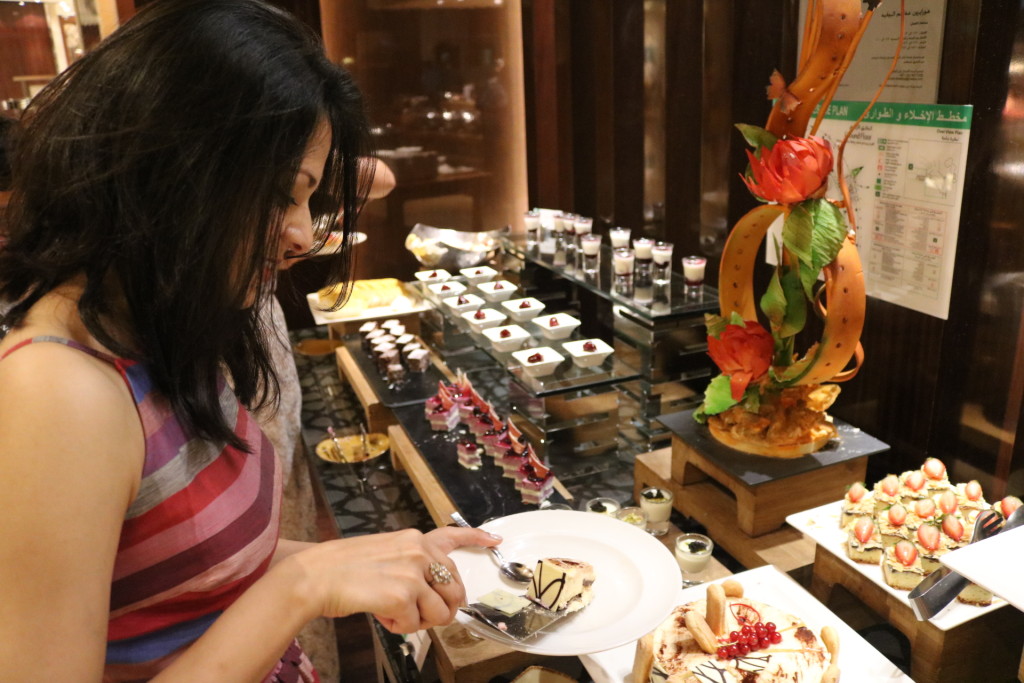
    Then we moved on to what I always highly await ever since the beginning of every meal — DESSERT!

    IMG_7726IMG_7722


    IMG_7724

    IMG_7723


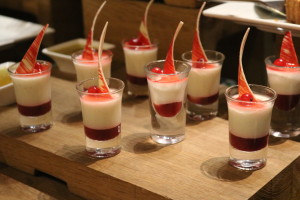
    We tasted pretty much all the desserts off the spread and relished every bite. My favorite was the blueberry panna cotta!

    IMG_7720

    Tiramisu being my all time favorite dessert I thought tasted great as well but was more jellied in texture (which made it dry) than being airy & creamy. Also, when we were at the dessert counter towards the end of our dinner, we were pleasantly greeted by the manager who mentioned to us that they would be hosting themed dinners (Italian, Arabic, Oriental etc.) at the restaurant starting September! I certainly look forward to attending one of them soon 🙂

    We went in happy and walked out happy. Your turn now! Purchase your Groupon here. Enjoy! <3
     

  • J&P Wedding San Francisco

    J&P Wedding San Francisco

    This year started off with some great events in different parts of India and UAE and led into my first official wedding project on Memorial Day weekend in San Francisco. I call this one official because the unofficial one was my own sister’s wedding.

    J&P

    The wedding consisted of a mehendi ceremony on day one, wedding ceremony and reception on day two. The wedding food was catered by Jalsa Events & Catering on both days. Jalsa being a renowned catering company in the bay area was undoubtedly going to deliver amazing food to the wedding. However, the purpose of my presence was to add value to the wedding by throwing in a couple of personalized yet creative elements to the wedding food scene, as a result of which the guests would be able to experience something unique.

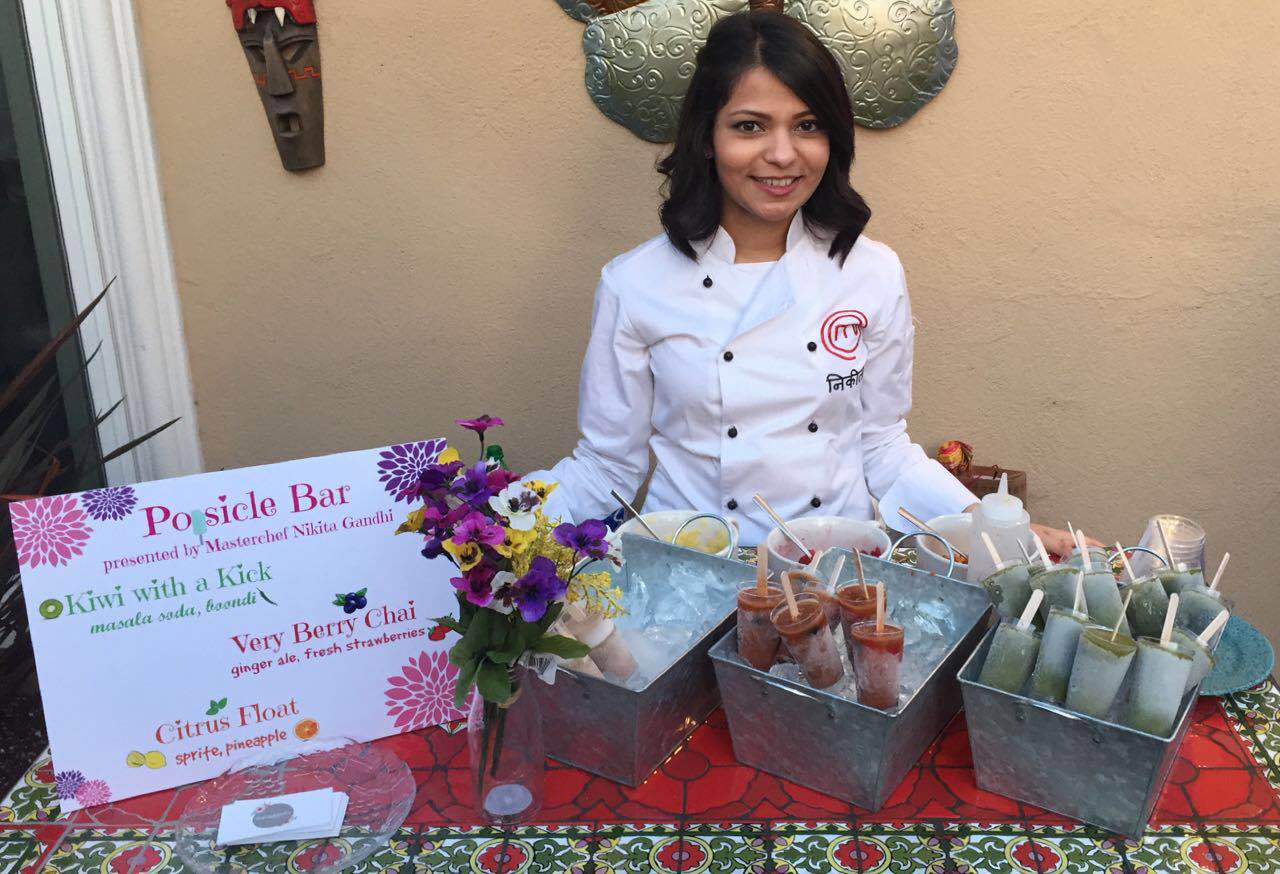
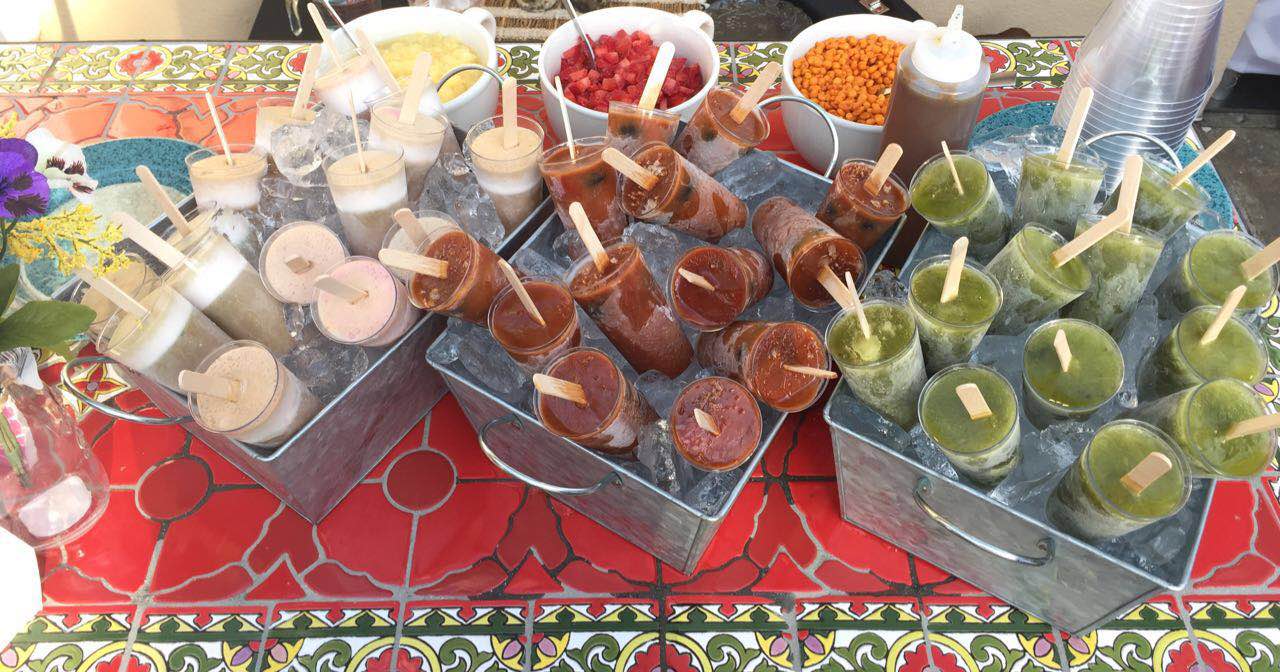
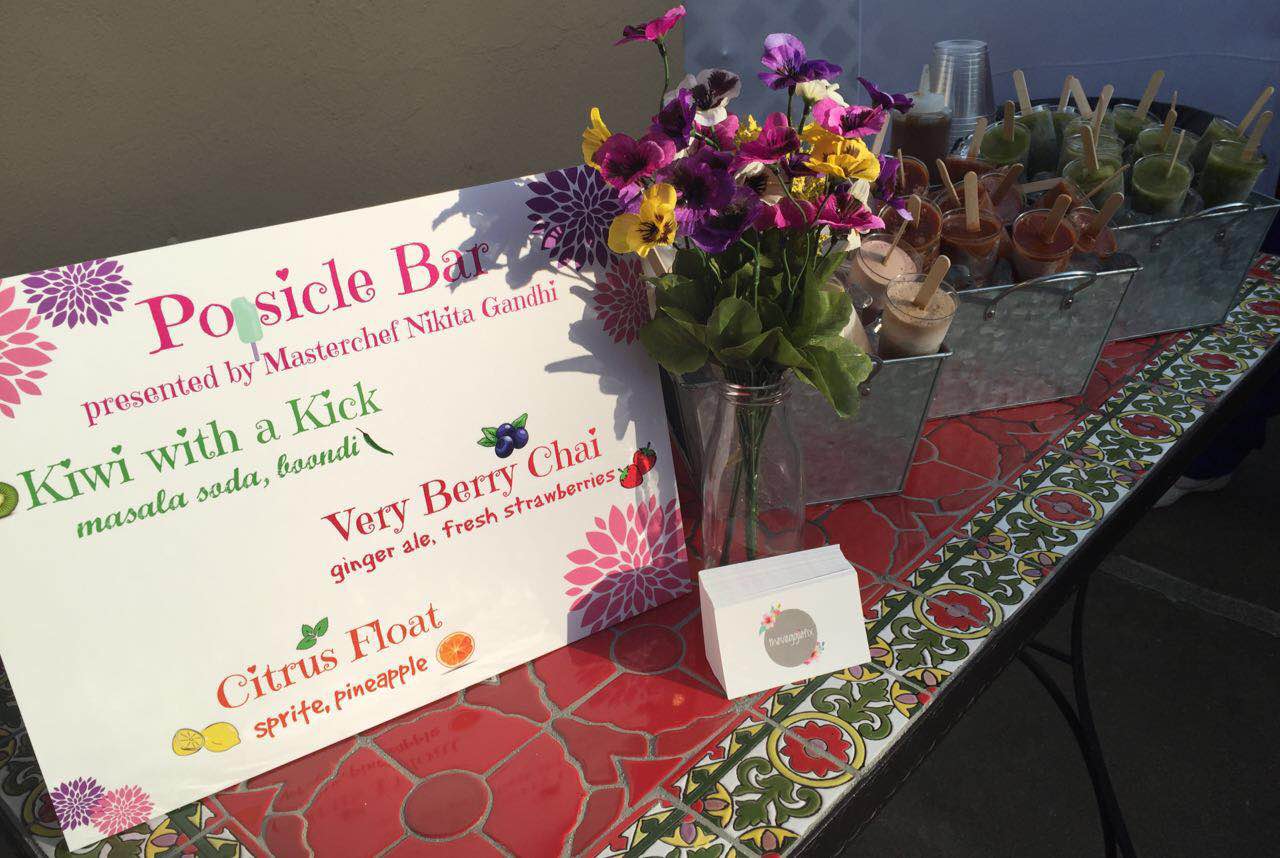
    The mehendi ceremony was held at the groom’s house backyard in Saratoga on a sunny afternoon. So for that I had set up a LIVE Soda-Popsicle Bar to beat the Cali heat!

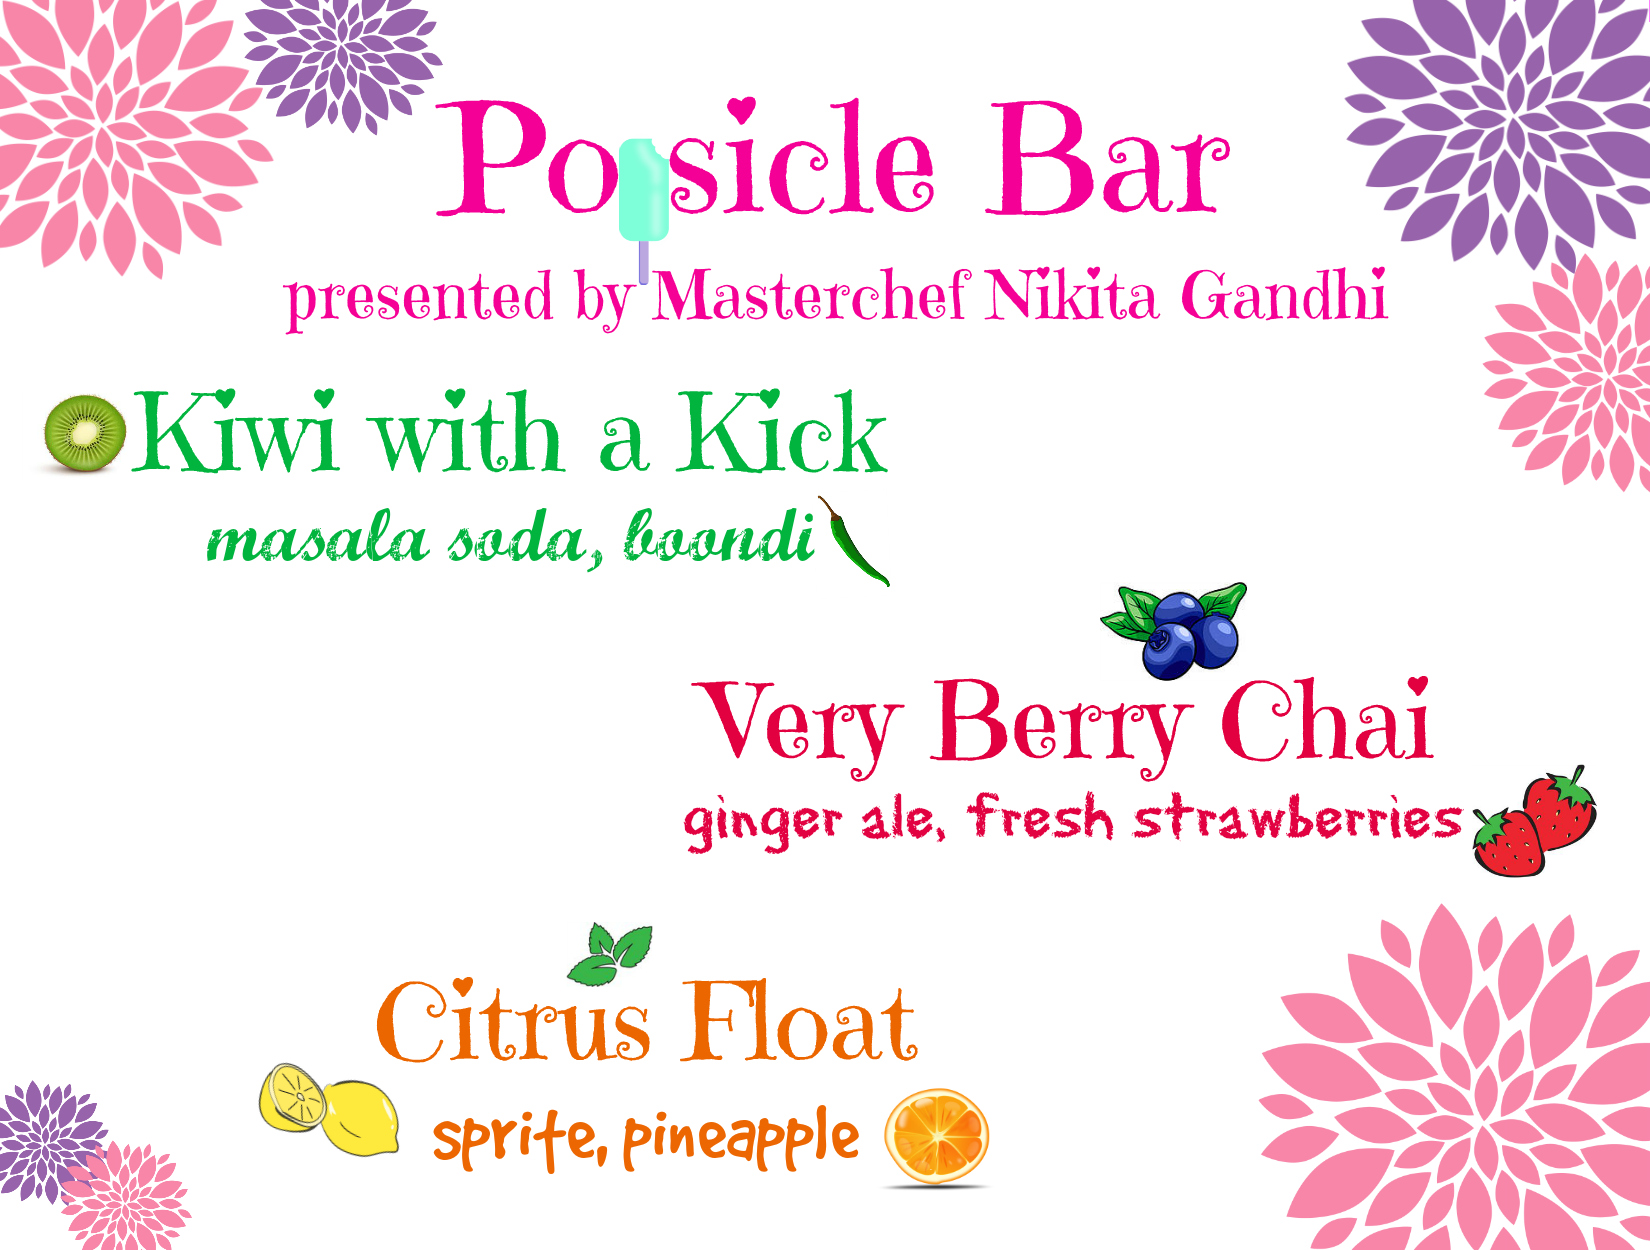
    Popsicle bar Menu (2)

    The flavors were all made super refreshing  keeping “California” in mind and the rich seasonal produce it boasts of.

    IMG_6021

    IMG_6020

    IMG_6022

    Each popsicle was paired with a different soda for some fizz and frenzy!
    A lot of the guests kept coming back for the ‘Kiwi with a Kick’ so may I say that was the party hit?!

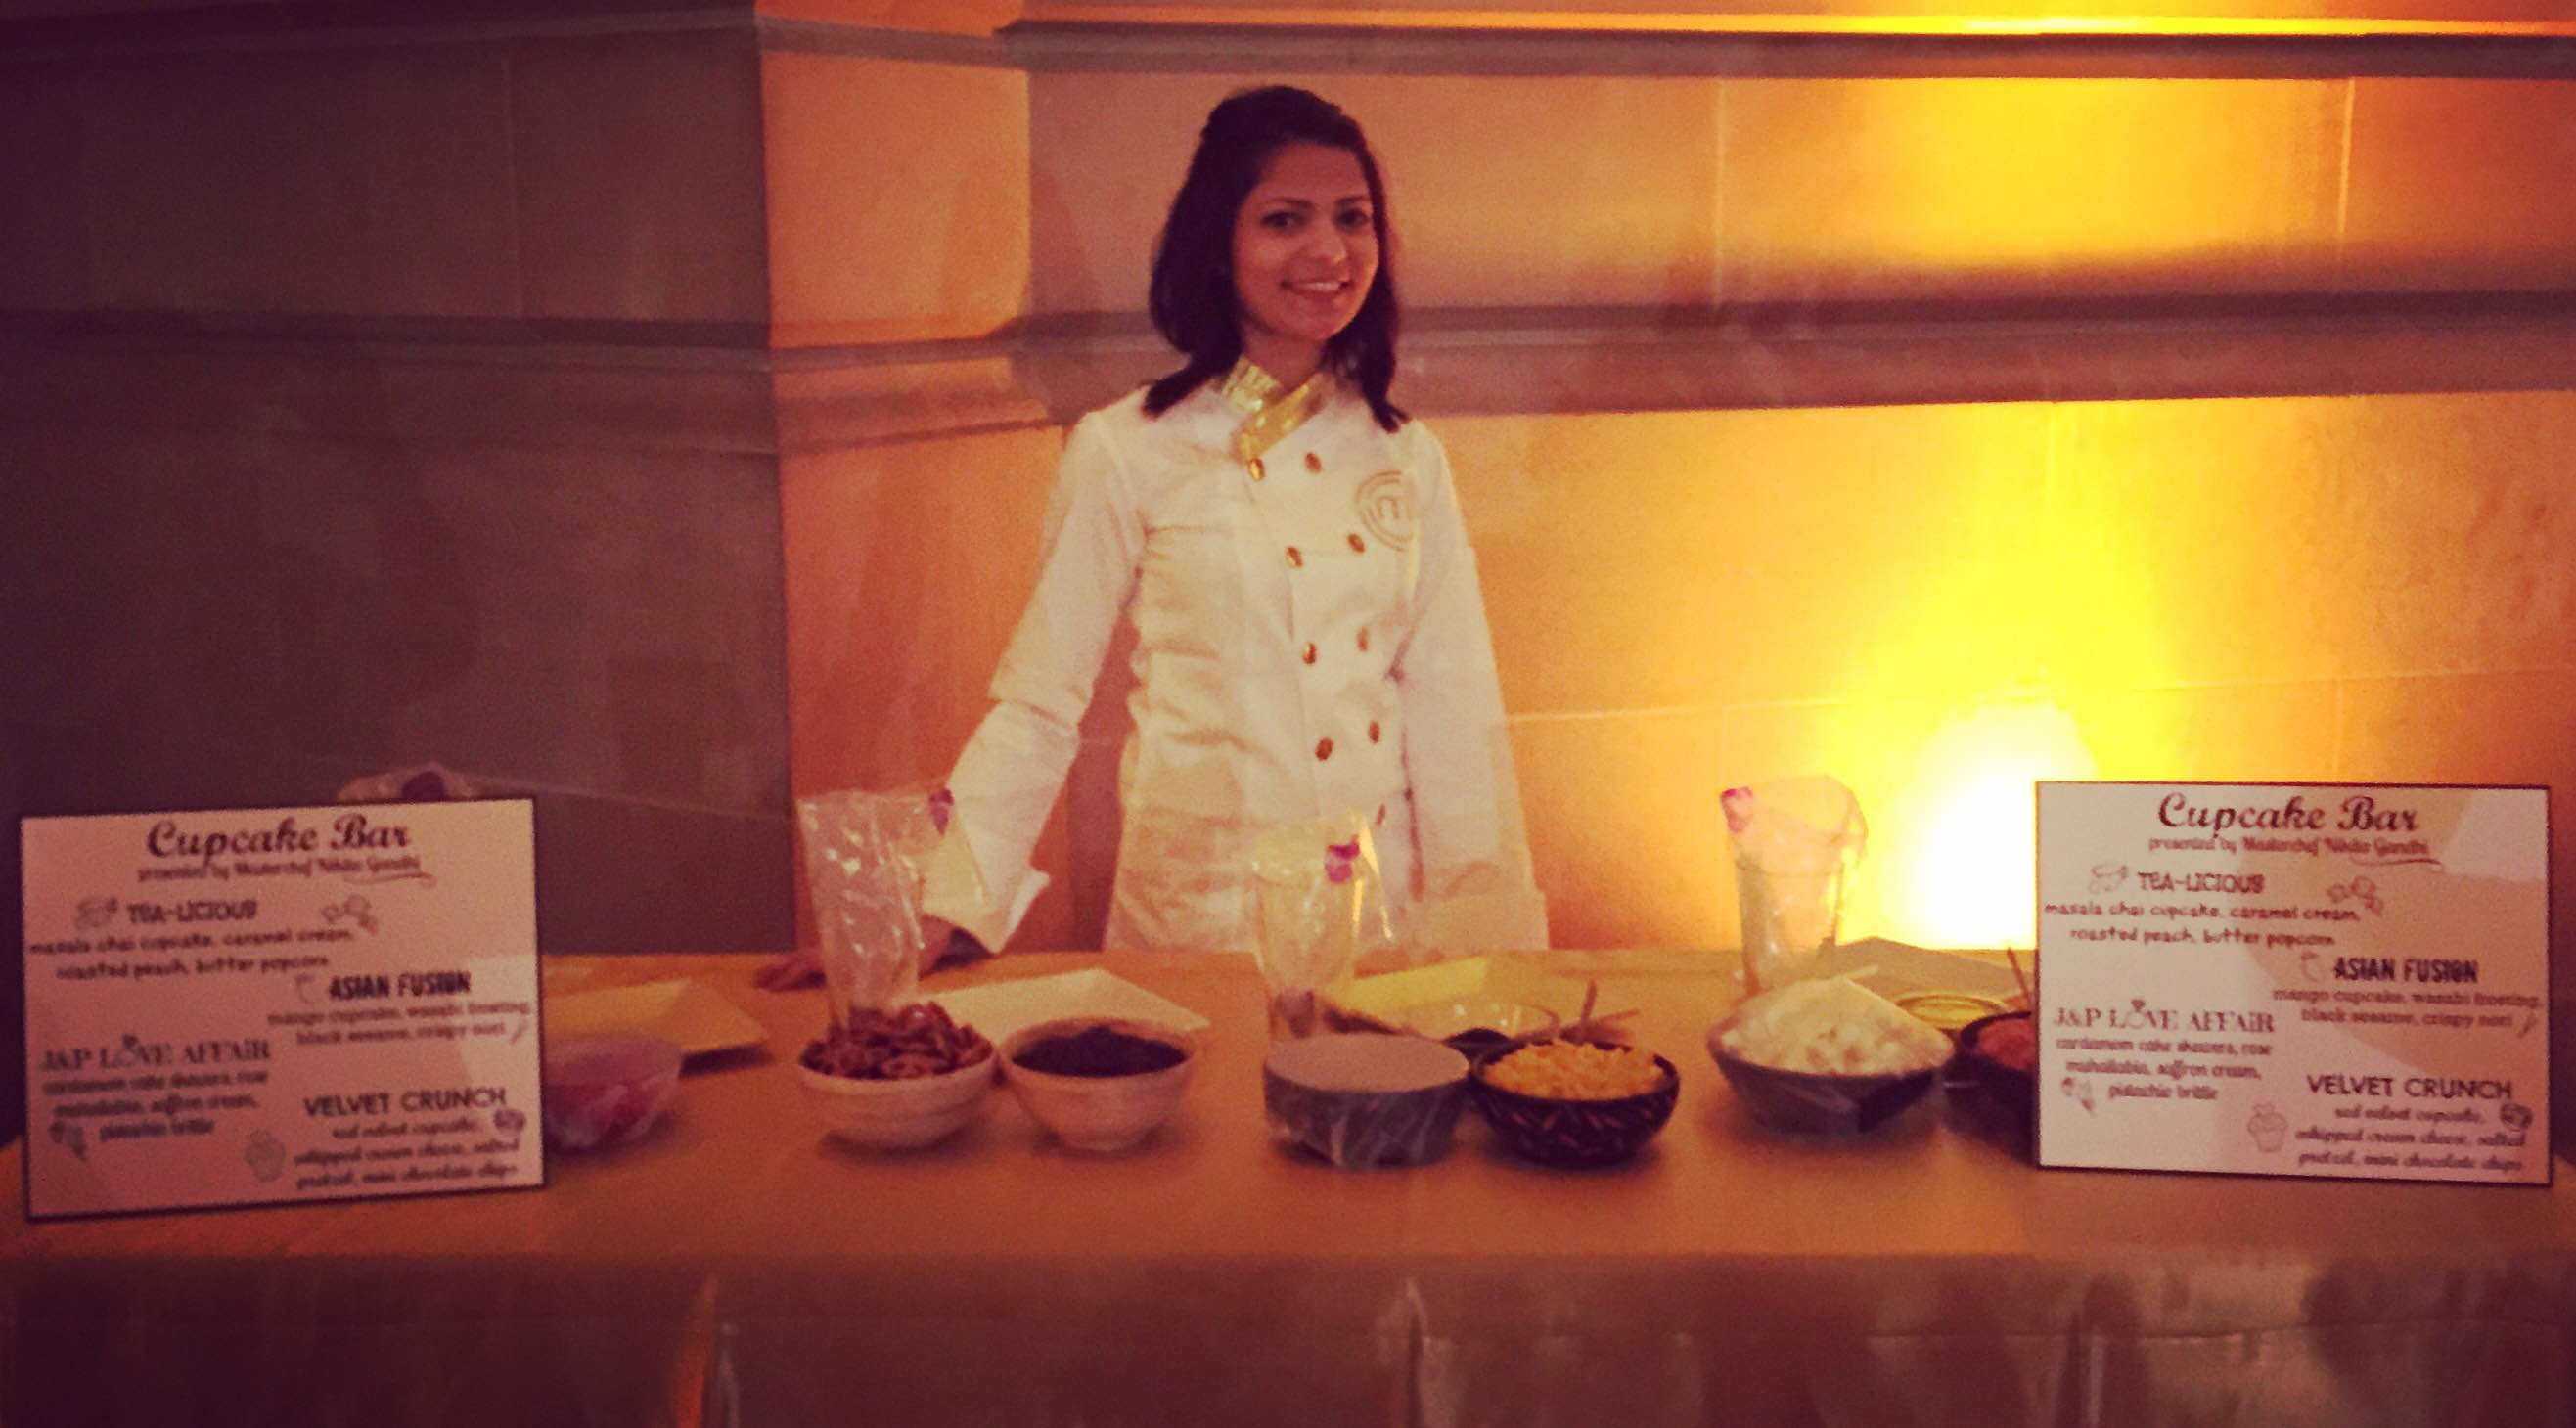
    After the success of my popsicle bar, I was all set and ready to present the LIVE Cupcake Bar on day two at the grand wedding reception held at the San Francisco City Hall.


    IMG_5885

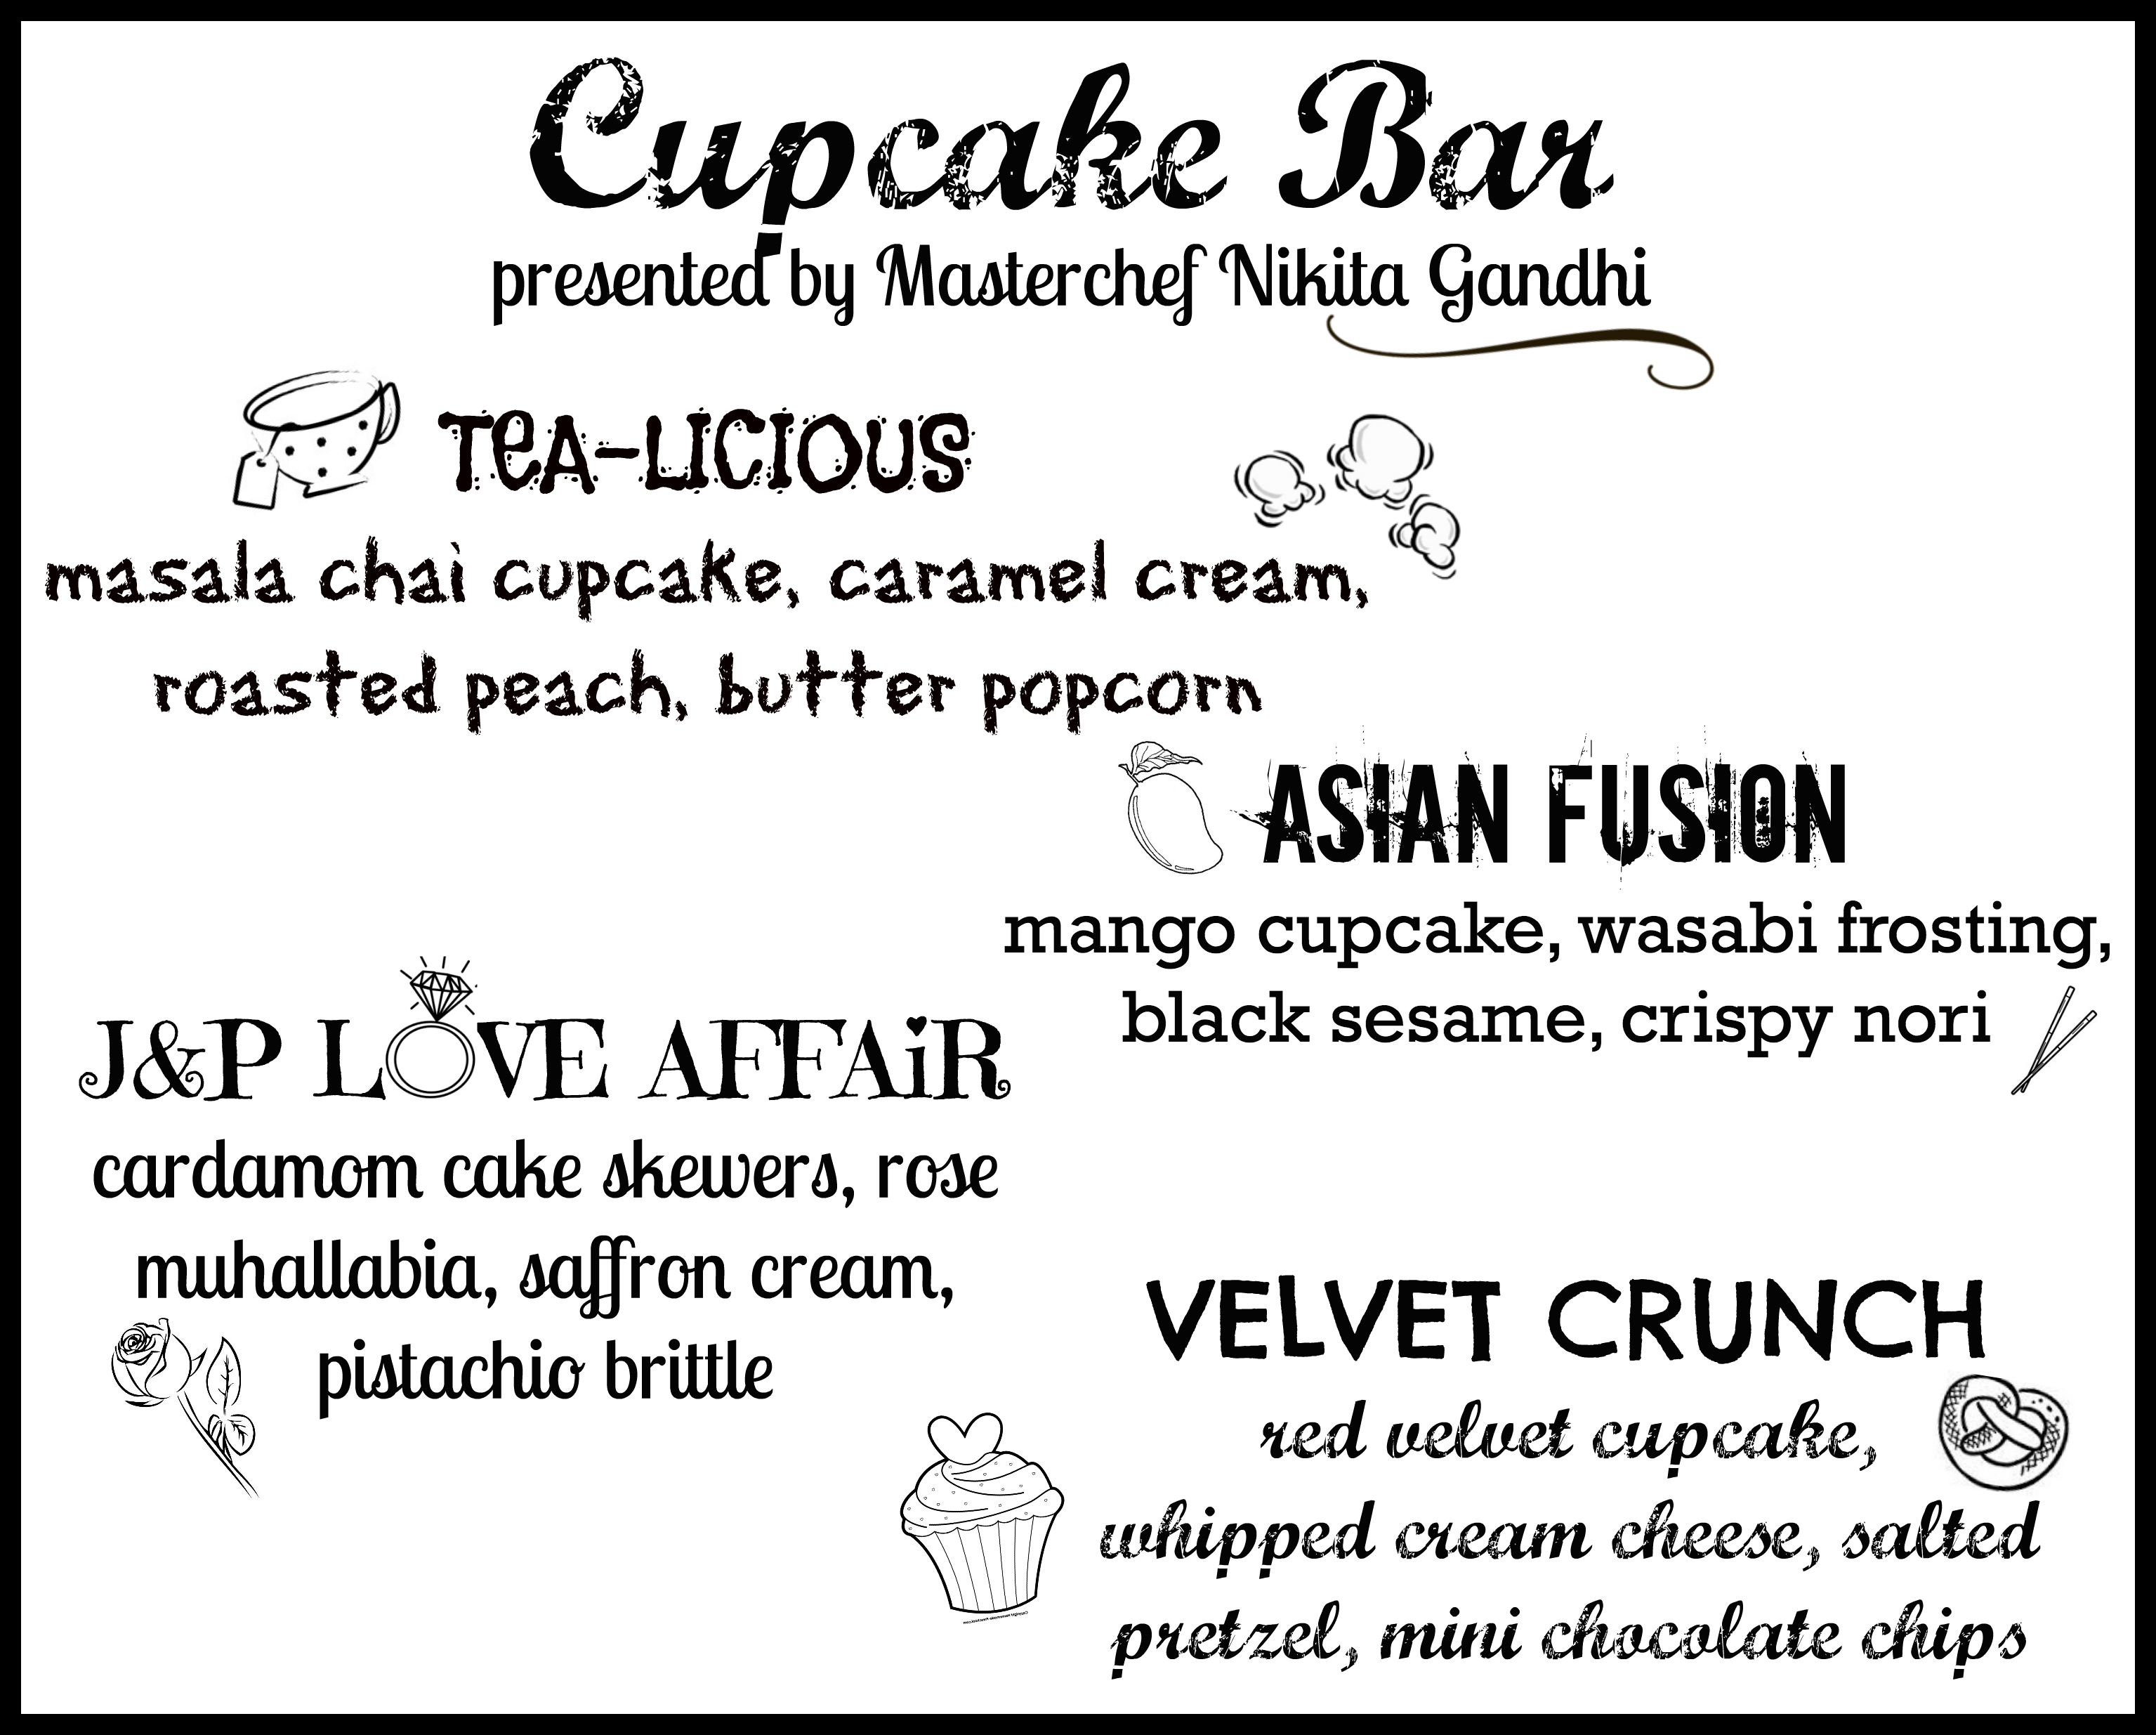
    The cupcake menu was put together based on the bride’s request to somehow incorporate chai, ginger, red velvet, cardamom, saffron, rose and pistachio as they were all the groom’s favorite flavors.

    Cupcake Bar Menu (2).jpg

    The most popular flavor among the adults was Asian Fusion, all because of its uniqueness. Velvet crunch was most popular among the kids. You can’t really go wrong with it, can you?

    IMG_5925

    The beautiful dim yellow lighting at the venue did not let me take the best pictures of the cakes but here is what I got!

    13305144_1226018557419486_2325533895181551853_o.jpg

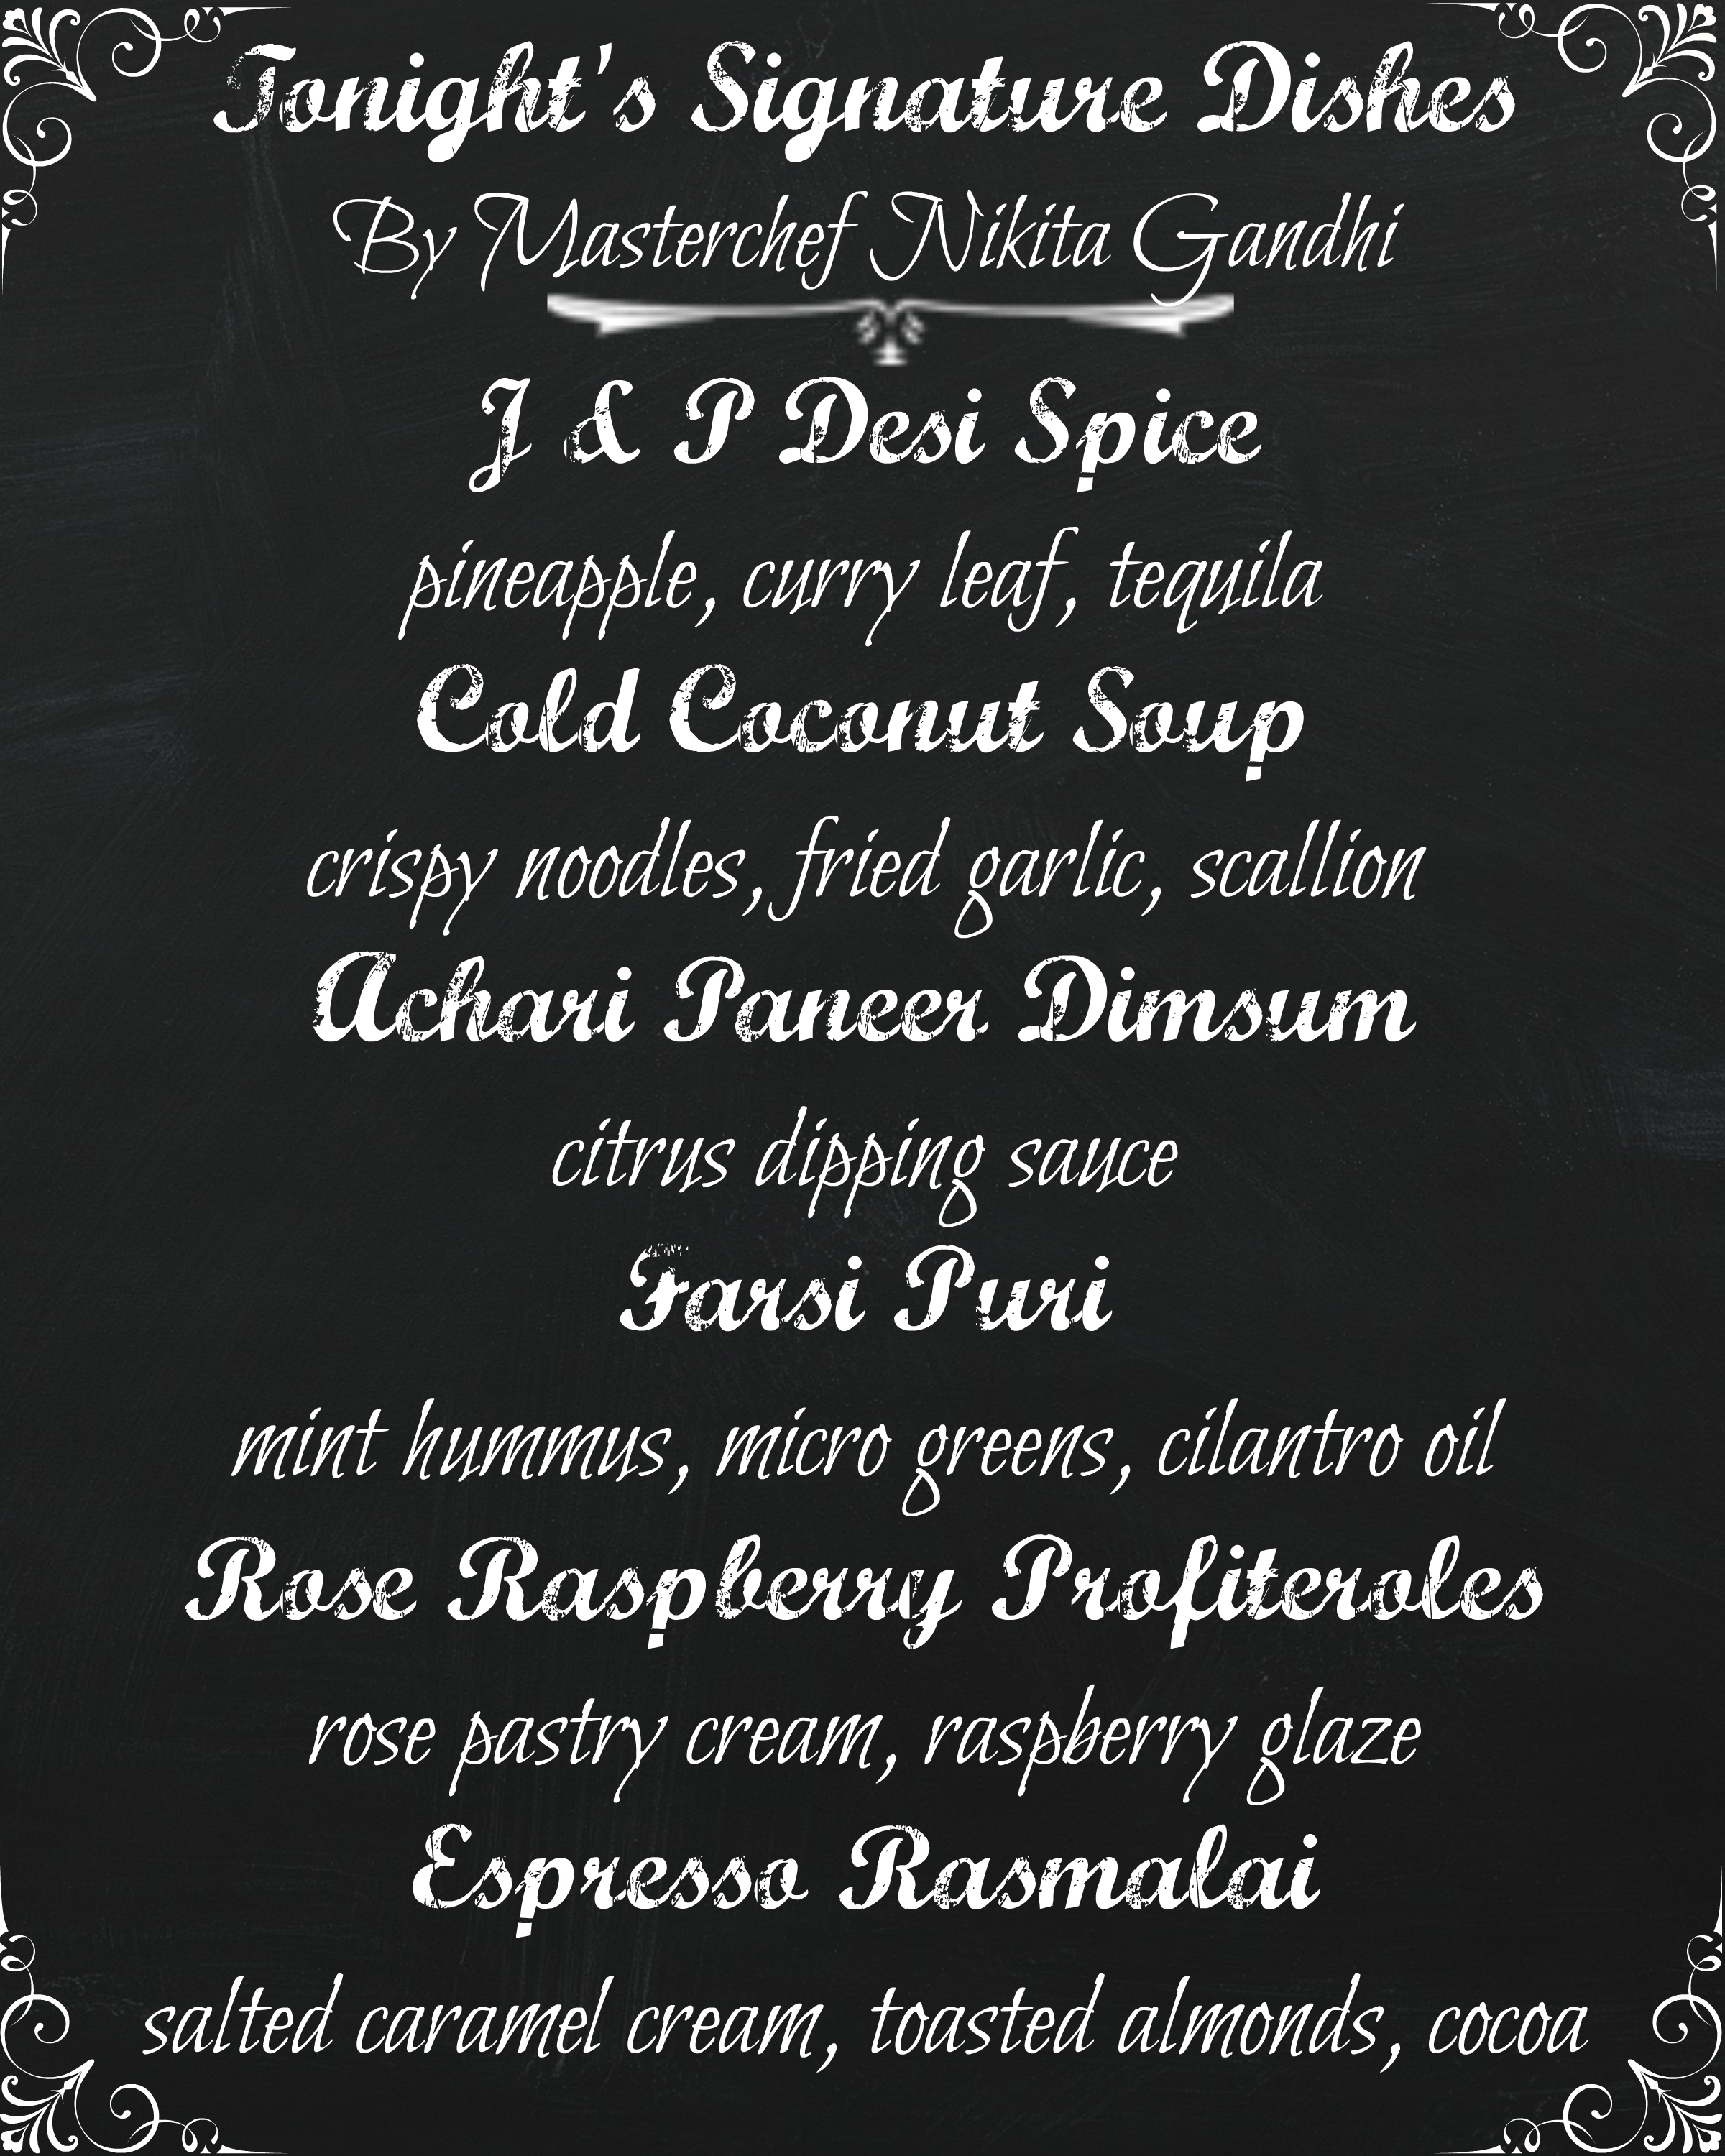
    In addition to the fun LIVE bar setups, I tied up with Jalsa Catering and had them create a few of my signature cocktails, appetizers and desserts!

    Cocktail Hour Menu (2).jpg

    If you’re looking to wow your guests at a wedding, party or event with some super cool and innovative food ideas, feel free to get in touch with me here!

  • Pomegranate Khandvi Lasagne

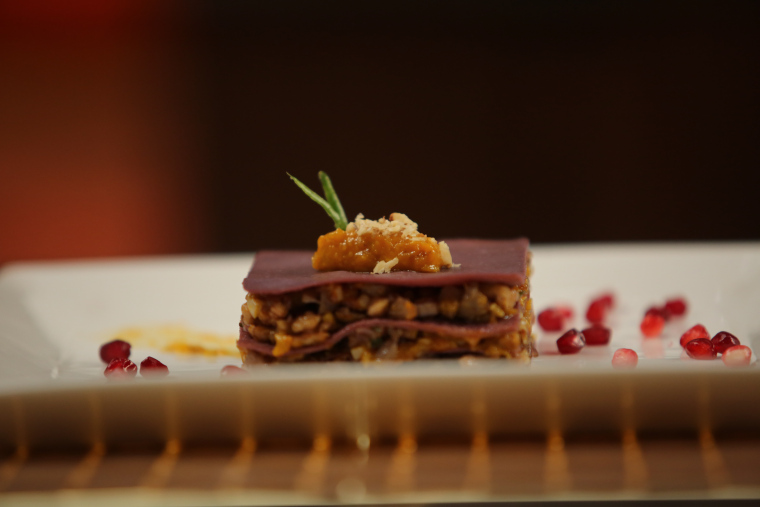
    Pomegranate Khandvi Lasagne

    Khandvi is probably my favorite Gujarati dish to make and eat. Making perfect paper thin, translucent khandvi is true art, I believe. And I must admit I can’t make it the way my mum does. Nonetheless, I can make it, well enough to satisfy a greedy craving.

    Traditional khandvi can get boring after a while and Masterchef has only taught us to elevate traditional dishes to something where imagination is given a chance to appear as an art. Khandvi is basically a result of 3 ingredients — gram flour, buttermilk, salt and sometimes turmeric.

    Our second week in the Masterchef Kitchen started with a Mystery Box challenge which had pomegranate, water chestnut, cucumber, physalis (cape gooseberry), lentils and walnuts. In addition, a regular support pantry with flours, sugars, dairy and basics.

    IMG_0025

    I decided to turn that typical yellow khandvi batter to something more fun like purple (or pink?)! And then screw the typical rolling and taking the easy way out — simply stacking sheets of khandvi that would resemble a lasagne.

    They loved the idea but were hesitant if I would finish it in time
                 They loved the idea but were hesitant if I would complete the dish in time

    But I did.
    IMG_0149
    And I was happy to hear the judges say “this dish is a masterstroke!”

    IMG_0155

    And present me the Star of the week!
    IMG_0297Now do you have a reason to not make this dish?! I guess not. So here you go!

    Pomegranate Khandvi Lasagne

    For the Pomegranate Khandvi Sheets:
    1/2 cup gram flour
    1/2 cup yogurt
    1 cup fresh pomegranate juice
    salt and red chili powder to taste

    1) Mix everything using a wire whisk to form a smooth batter. Rest for 20 minutes.
    2) Cook it in nonstick pan stirring constantly so no lumps form.
    3) Once it’s very thick, spread it on the counter into a thin layer using a palette knife and then cut it in squares.

    For the Water Chestnut & Walnut Filling:
    1 small onion, finely chopped
    1 green chili, finely chopped
    8 canned water chestnuts, chopped
    4 tablespoons walnuts, lightly roasted
    salt and pepper to taste

    1) Heat oil in a pan.
    2) Sauté onions and green chili till translucent.
    3) Add in water chestnuts and sauté till cooked well.
    4) Lastly add in walnuts and mix. Season with salt and pepper and keep aside.

    For the Cape Gooseberry Sauce:
    15-20 cape gooseberries
    1 tbsp oil
    2 cloves garlic, finely chopped
    1 teaspoon sugar
    1 teaspoon cornstarch dissolved in water
    Salt and pepper to taste

    1) In a pot of boiling water, add in cape gooseberries, cover and boil till softened.
    2) Grind them in a blender to a smooth paste.
    3) Heat oil and sauté garlic. Add in the paste and reduce it on low heat.
    4) Add in cornstarch slurry and keep cooking untilthe sauce is somewhat thickened.
    5) Season with sugar, salt and pepper.

    To Assemble the Khandvi Lasagne:
    1) Brush some sauce on a plate.
    2) Place a sheet of khandvi in the cutter. Spread some sauce. Spoon some filling over. Place another sheet and continue to form the layers until you have 4 sheets of khandvi and 3 layers of filling.


  • Wintery Tart

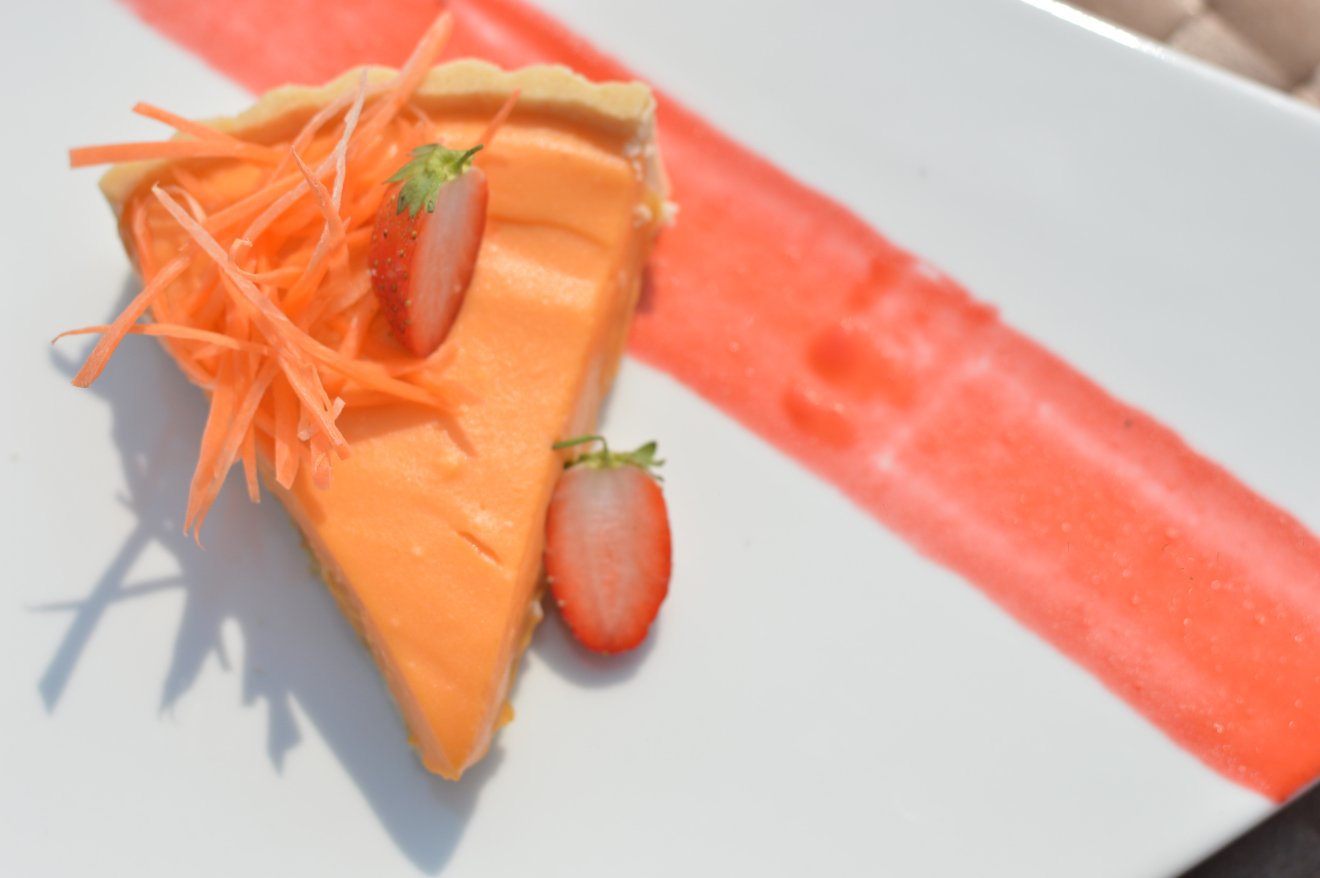
    Wintery Tart

    If I’m ever asked what my FAVORITE recipe from the MasterChef Kitchen is, I’d say “Wintery Tart”. More than just being a winner recipe, it has been a blessing for me. It is that first recipe I made as a result of a Mystery Box challenge when we were in bootcamp (top 30) and got me the first apron (with my name on it) to enter the top 12, from where started the real journey.

    If at all you’re curious to know what was in that Mystery Box, we had carrots, cinnamon, strawberries, pineapple, lentils and purple yam. In addition, we had a support pantry with basics such as flours, sugars, ginger, garlic and dairy.

    DSC_0235
                           It was an honor to demonstrate this recipe with Chef Ranveer Brar in the week’s                                                                        MasterChef Extraclass episode @ Holiday Inn, Mumbai

    DSC_0227

    Wintery Tart

    For the Tart Pastry:
    90 grams unsalted butter
    1-tablespoon oil
    3-tablespoons water
    1-tablespoon sugar
    1/8-teaspoon salt (skip if using salted butter)
    150 grams plain flour

    1) In a saucepan, heat together butter, oil, water, sugar and salt until the butter melts completely and the mixture is bubbling.
    2) Turn off the heat and dump in all the flour at once. Mix quickly just until soft and smooth dough comes together. Do not overwork the dough.
    3) Using a spatula, evenly spread the dough out and up the sides of an 8” loose-bottomed (preferred) tart pan.
    4) Prick the pastry all over using a fork. Bake for 12-15 minutes in an oven preheated to 190ºC/375ºF.
    5) Remove from oven and let it cool completely before filling.

    For the Carrot Ginger Rice Custard:
    2 medium carrots, roughly chopped
    2 inch piece ginger, roughly chopped
    2 cups milk
    1/3 cup sugar
    1/4 cup rice flour

    1) Boil together the roughly chopped carrots and ginger until tender. Blend them to make a purée.
    2) In a saucepan, heat together the milk and sugar until the sugar is fully dissolved.
    3) In a separate bowl, whisk together the rice flour with some additional milk to form thin smooth slurry.
    4) Slowly add this slurry to the hot milk while whisking continuously and vigorously.
    5) Continue stirring and cooking the custard until it thickens significantly.
    6) Lastly, turn off the heat and mix in the carrot and ginger purée.
    7) Pour out the custard into a bowl, and cover with saran wrap touching the surface of the custard. Refrigerate to cool completely.

    For the Pan-roasted Cinnamon Pineapple:
    1 cup fresh pineapple, chopped
    1/4 cup sugar (or depending on the natural sugars of the pineapple)
    1 inch stick cinnamon, freshly ground

    1) Place the chopped pineapple and sugar in a non-stick saucepan over medium heat.
    2) Cook until the pineapple is nicely roasted with a crusty golden hue.
    3) Add ground cinnamon and cook for another minute. Grind the mixture in a small mixer jar.
    4) Set aside to cool.

    For the Strawberry Purée:
    4 fresh strawberries
    1-teaspoon confectioner’s sugar

    1) Blend the strawberries with sugar.
    2) Strain the mixture.

    For garnish:
    Carrot juliennes
    Fresh pineapple wedges
    Ground cinnamon

    To Assemble the Tart:
    1) Evenly spread the pan-roasted cinnamon pineapple on the bottom of the cooled tart pastry.
    2) Spread the carrot ginger rice custard over the pineapple layer. Smoothen the top using a palette knife.
    3) Refrigerate the tart until the filling is set well.
    4) Brush a strip of strawberry purée on the bottom of a plate. Place a slice of the tart on top, garnish with carrot juliennes, pineapple wedges and ground cinnamon.
    5) Serve.

    Serves 6.

  • Goat Cheese Stuffed Piquillo Peppers inspired by José Andrés

    Goat Cheese Stuffed Piquillo Peppers inspired by José Andrés

    This past summer, we went to Miami where my sister got engaged to the love of her life.

    And to celebrate the big day, we went to dinner at The Bazaar By José Andrés — a restaurant that partly specializes in molecular gastronomy alongside traditional Spanish tapas.

    We were thrilled about the whole concept of molecular cooking and so we started off with some terrific cocktails followed by appetizers, some of which looked like they were prepared at a science laboratory.

    10649988_10152749096582363_4027406754263982272_n
    Passion Fruit Up rum, passion fruit and ginger-laurel syrup, topped with passion fruit foam
    10703619_10152749096222363_1968231899635294072_n
    The Ultimate Gin & Tonic lemon verbena, lime wheels, juniper berries, fresh orchid
    10666100_10152749096392363_672584510269972363_n
    Not Your Everyday Caprese liquid mozzarella (that was like air balloons, cherry tomatoes, basil
    1907424_10152749095857363_653184382556683495_n
    Brussels Sprouts lemon pith purée, apricots, grapes, lemon air, plantain chips
    1620983_10152749095612363_5348278526651193344_n
    LN2 Caipirinha frozen using liquid nitrogen
    10704184_10152749095717363_7383426334953266501_n
    Making Liquid Nitrogen Caipirinha at the table
    10644876_10152749095992363_4978872312839597819_n
    Patatas Bravas fried potatoes, spicy tomato sauce, alioli
    10407131_10152749095497363_3588125686938057134_n
    Flaming S’mores peanut butter icecream, torched marshmallow


    Screen Shot 2014-10-21 at 5.39.10 PM

    In addition to the above dishes and many others, one of them was Stuffed Piquillo Peppers which was not on the menu but it was a chef’s recommendation for our little “veggie” group at the table. So we went with it. It probably was the best decision of the night. All of the tapas were very good, but none like the Stuffed Piquillo Peppers. That being said, I had to try making them at home. Here’s my take on it — it was very similar to the original, if not better. Or maybe even.

    IMG_1864

    For the peppers
    6 – piquillo peppers/sweet mini peppers
    2 oz – plain goat cheese
    a drizzle of olive oil

    For the Sweet Balsamic
    1/4 cup – balsamic vinegar
    1/8 cup – brown sugar

    [youtube https://www.youtube.com/watch?v=s3Jb1eTE0VQ&w=560&h=315]

  • Classic Creamy Hummus

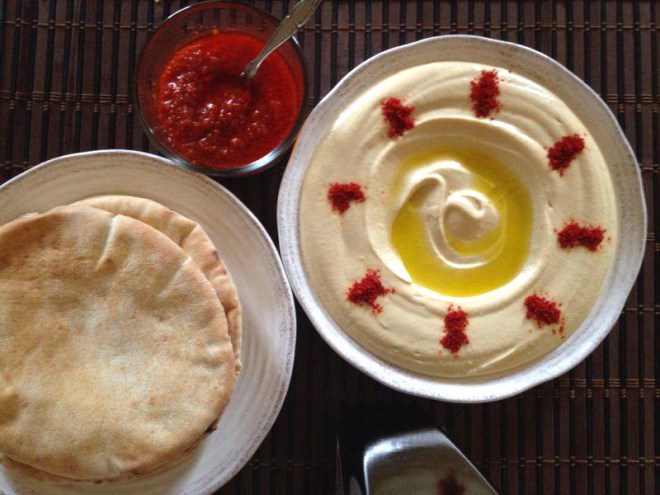
    Classic Creamy Hummus

    In the four years that I have lived in America, this place has not only served me mediocre weather, but also mediocre Arabic food. The one thing I miss most about home is the delectable Lebanese food — especially the luscious, silky, smoothest-ever hummus.

    This hummus recipe is a keeper. It is so smooth and creamy, it tastes exactly like the one we used to get at our local Arabic restaurant called Lebanese Flower, back at home in Abu Dhabi. 1 can (16 oz) – chickpeas OR 1 cup chickpeas soaked overnight and pressure cooked 1 cup + 1/2 cup – chickpea stock (preferred) or water 1/2 cup – labneh OR greek yogurt (If using regular yogurt, make sure to strain out the water) Salt to taste 1/4 cup – olive oil 2 tablespoons – lemon juice freshly squeezed 2 to 3 cloves – garlic 1/4 cup – tahini (you can use store bought paste or make your own by blending together 1/8 cup roasted sesame seeds with 1/8 cup olive oil) Cayenne pepper, parsley and olive oil for garnish [youtube https://www.youtube.com/watch?v=dxhjiPh6uDU&w=560&h=315]

  • Pav Bread (Indian Bread Rolls)

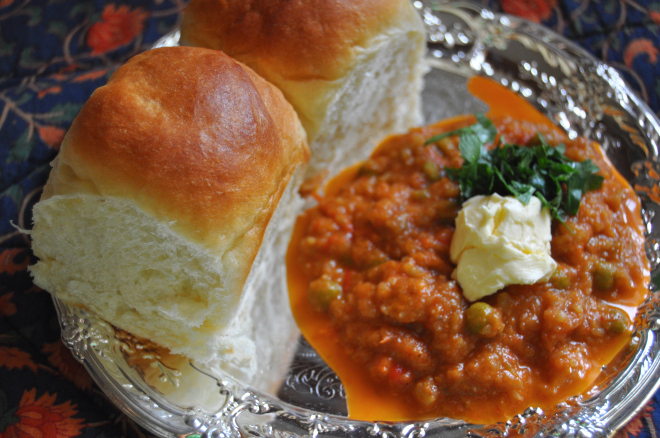
    Pav Bread (Indian Bread Rolls)

    These super soft, airy and slightly sweet bread rolls are an Indian street-food star.

    They are generally sliced in half, slathered with Amul butter on both sides and grilled on a hot pan till a layer of golden crisp steals your attention.

    DSC_0765

    Although this recipe does make the typical Indian bread rolls, they can really be served with anything and not necessarily used strictly in Indian fast food.

    DSC_0687

    Making them at home could not get easier; just a few basic ingredients, some patience and that’s it!

    For the bread dough:

    3/4 cup – warm milk
    2 1/4 teaspoons – dry yeast
    2 tablespoons – sugar
    2 cups – bread flour (plain flour can also be used)
    2 tablespoons – milk powder
    1 teaspoon – salt
    1/4 cup – unsalted butter, softened

    For brushing the tops:

    1 tablespoon – milk
    1 tablespoon – butter, melted

    Note: In the video, I am using my stand mixer to make the dough. But this can be done by hand too.

    [youtube https://www.youtube.com/watch?v=KiRVeXhb8wY&w=600&h=355]

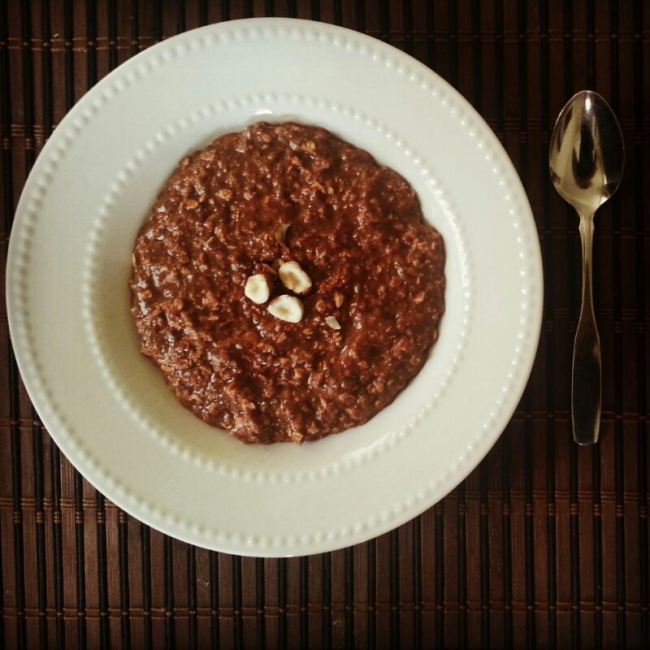
  • Chocolate Hazelnut Porridge

    Chocolate Hazelnut Porridge

    I don’t know if this is normal, but the first thing my sister and I crave every morning is dessert. While I generally eat a banana to satisfy my sweet craving, my sister comes up with some super healthy breakfast (dessert) ideas, like this one — chocolate hazelnut porridge. We usually keep jars full of homemade, all natural chocolate hazelnut butter and chocolate almond butter at the ready. You can simply mix a dollop of this butter with oats, spread it on toast or eat it plain by the spoonful.

    This porridge can be eaten hot or cold. I like it cold because it tastes more like a pudding than porridge.

    Chocolate Hazelnut Porridge
    1 cup — milk
    1/4 cup — rolled oats
    1 tbsp — chia seeds
    1 (very generous) tbsp — chocolate hazelnut butter (or Nutella)
    1 tbsp — roasted hazelnuts, chopped (optional)
    to taste — agave syrup/honey/maple syrup (optional)

    If you like it hot:

    1) Mix the oats, chia seeds and milk and leave it in the fridge to soak overnight. (This step is optional but it helps the oats and chia seeds cook a lot more quickly if you’re in a morning rush.)
    2) Right before serving, heat it in the microwave on high for about 2 minutes. You may need to add a little more milk if it gets undesirably thick.
    3) Stir in the chocolate hazelnut spread, roasted hazelnuts and sweetening agent and serve.

    If you like it cold:

    1) Heat the milk, oats and chia seeds in the microwave for 3-4 minutes or until the oats are cooked.
    2) Stir in the chocolate hazelnut spread, roasted hazelnuts and sweetening agent, cover and leave it in the fridge until breakfast next morning.

  • Sundried Tomato Dressed Pasta Salad

    Sundried Tomato Dressed Pasta Salad

    For the pasta salad:

    2 handfuls – pasta of your choice (I used whole wheat fusilli), boiled
    2 tablespoons – olive oil
    1 – small onion, sliced
    1 handful – mushrooms, sliced
    1 – zucchini, sliced
    1 – small bell pepper, sliced
    1 clove – garlic, minced
    optional – grated cheese of your choice (I used a mix of emmental & gruyere)

    1) Heat olive oil in a pan, add in onions and sauté for 2 minutes till transparent.
    2) Add in mushrooms and cook till lightly browned. Lastly add in zucchini, pepper and garlic and sauté for a few more minutes.
    3) Add in cooked pasta and sundried tomato dressing and stir well. Refrigerate the salad and mix in the cheese right before serving time.

    For the dressing:
    4 to 6 whole – sundried tomatoes
    1 clove – garlic
    1 small – dried red chili (you can use red chili flakes too)
    3 tablespoons – extra virgin olive oil
    1 tablespoon – balsamic vinegar
    to taste – salt & pepper

    1) Place all the ingredients in the jar of a blender/food processor and blitz till nearly smooth.


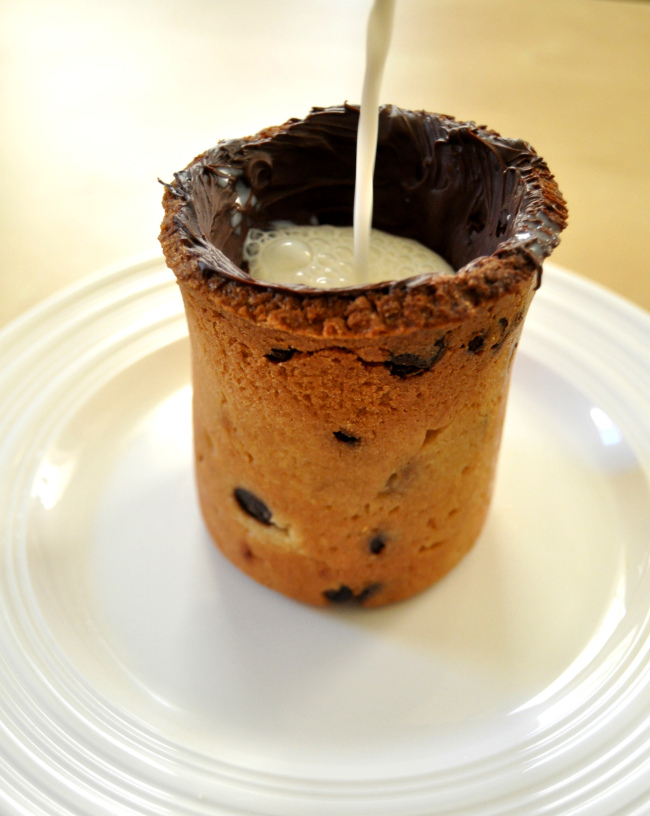
  • The Cookie & Milk Cup

    The Cookie & Milk Cup

    This weekend was an eventful one — we celebrated our friend’s visit to Baltimore on Thursday night with some great food, went out to dinner at Papi’s Taco Joint on Friday night, visited the Boordy Vineyards on Saturday afternoon, cooked a homestyle Arabic dinner, and made “The Cookie-and-Milk Cup” on Sunday afternoon. This cookie cup is inspired by the Cookie Shots — a brilliant invention of Chef Dominique Ansel, who is also the creator of the world famous Cronut. Hailing from France, Chef Ansel was alien to the common concept of dipping warm cookies in cold milk and so his genius mind thought “why not combine the two?” To hold the milk without leakage, he coats the inside of his cookie shots with a heat-resistant chocolate glaze so that he can warm the cookie shots (without melting the glaze) before pouring in the cold milk and serving. He fills his cookie shots with ice cold milk touched with vanilla and sugar, which makes them even more special.

    Image

    On my last visit to NYC, we were so close to visiting the Dominique Ansel Bakery in SoHo for some Cookie Milk Shots, until we found out they were closed that week due to a severe mice infestation. Those cookie shots had been on our minds since then and so the family finally got me to make them. I did not have oven-safe shot glasses so I used stoneware teacups and made cookie cups instead of cookie shots. The amount of dough that went in one cup was equal to almost 4-5 regular sized cookies. So the cookie cups were obviously pretty heavy. I coated the insides of the cups with melted dark chocolate to make them sturdy enough to hold a good amount of milk. And lastly, I got the vanilla bean infused milk ready to get poured into the cookie cups. We thought that the vanilla milk was the star of the cookie cups. It was cold, barely sweet and super refreshing.

    This cookie cup was definitely fun to make. But watching others trying hard to eat it in a dignified manner was much more fun! Make it at home and you will not have anyone judge you by your chocolate smeared face! 😉

    Image

    The Cookie & Milk Cup

    Partially adapted from Byron Talbott

    For the cookie cup:
    2 cups – plain flour

    1/2 tsp – salt
    1/2 cup – unsalted butter, softened
    1/2 cup – granulated sugar
    1/2 – brown sugar
    1 – egg
    1/2 cup – semi-sweet chocolate chips
    1/2 cup – dark chocolate for the coating

    For the vanilla bean infused milk:
    1 cup – cold milk
    1 inch piece – vanilla bean, split & scraped (or use 1/8 tsp of vanilla bean paste)
    1/4 tsp – sugar

    1) Whisk the butter and sugars for 3-5 minutes till smooth and creamy. Add in the egg and whisk till incorporated.
    2) Add in the salt and flour, a third at a time and mix just till incorporated. Mix in the chocolate chips.
    3) Cover and refrigerate the dough for 30 minutes. In the mean time, brush the insides of 6 oven-safe teacups with oil or melted butter. Alternatively, you can use a popover pan to make these cups.
    4) Make the vanilla milk by combining all the ingredients and refrigerate till it’s ready to use.
    5) Lightly flour your hands. Divide the chilled dough among the greased cups and press it firmly and evenly on the base and sides of the cup, making sure there are no holes/cracks/air pockets. Also make sure the cups have a decent thickness. They will break if they are too thin. Smooth the insides using a straight rolling pin or a similar shaped object.
    6) Place a piece of foil big enough to cover all the dough inside the cup. Then fill the cup with pie weights or any uncooked beans like black beans, kidney beans or garbanzo beans. If you skip this step, your cookie cups will not remain hollow. They will rise and there will be no room to pour the milk.
    7) Place the cups on a baking sheet and bake them for 15 minutes in an oven preheated to 375°F. Take the cups out and carefully pull out the foil with beans in it. Place them back into the oven for another 5-8 minutes or until the cookie cups have brown edges. Let them cool for 30 minutes.
    8) Gently invert the cups and the cookie cup should easily slide out. Melt the dark chocolate in a double boiler or microwave and brush it on the insides of the cookie cups, paying special attention to any cracks that developed during the baking process. This will make the cups sturdy enough to hold the milk well. Refrigerate the cookie cups for 20 minutes or till the chocolate coating hardens. 

    9) When ready to eat, pour in the vanilla milk.
    10) Take a sip of milk, take a bite of the cookie, take a sip, take a bit, take a sip, take a bite, share and enjoy!